Fitting 'Ford Power' Start Button
Posted: Fri Jan 07, 2011 7:35 pm
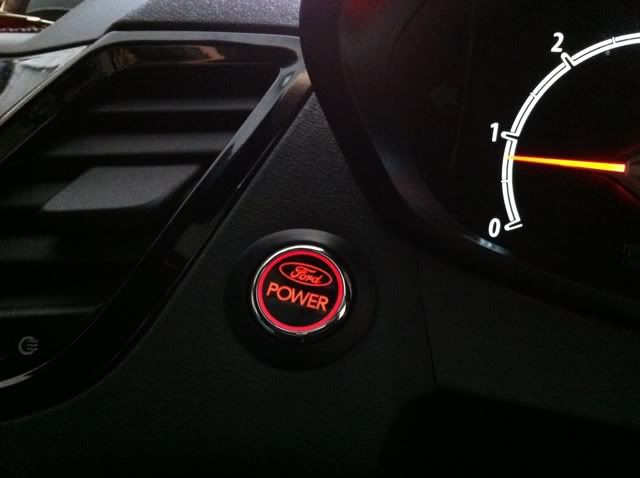
A short guide to show you how to fit the 'Ford Power' push start button to a 2008- Ford Fiesta (Mk7)
*This will not replace your key
It will only work when the key is turned to stage 2
What you will need:
Push Start Button - 1459645
Push Start Plastic Bezel - 1574152
Push Start Aluminium Look Bezel - 1667755
12V 30Amp Relay
Soldering Iron & Solder
Red & Black 5Amp Wire
10A Fuse & Holder
Wire Strippers/Crimps
Pliers
Spade Connectors To Suit Relay
Torx Driver
Decide where you would like the button to be positioned
First position I had it
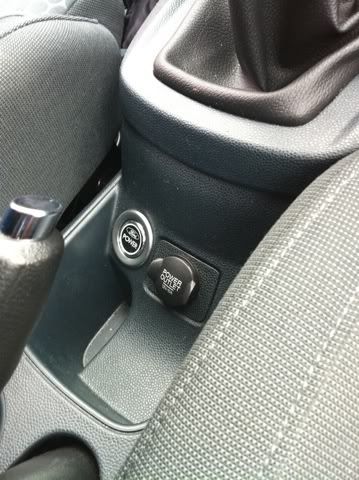
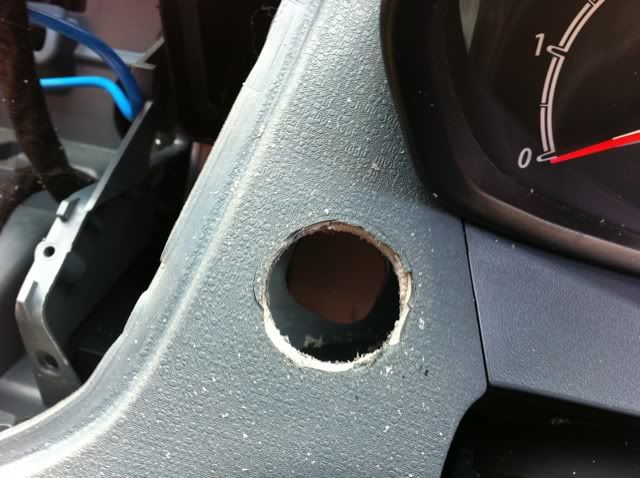
Then I moved it to here
(Pretty hard to cut, BE WARNED!)
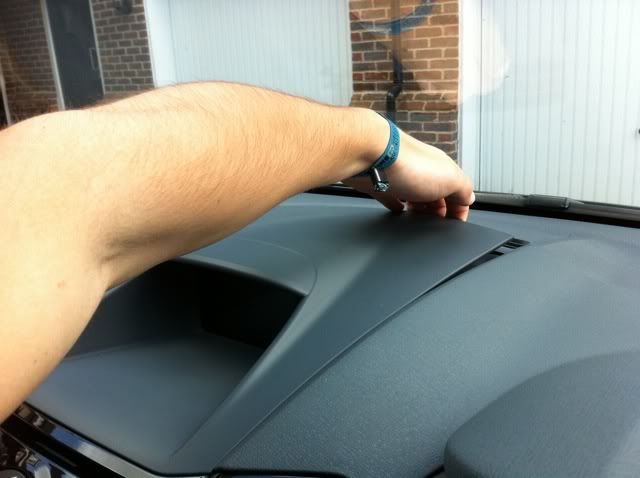
First I removed the stereo
Pull up screen surround from the front
Unscrew 2 T25 Torx screws and 2 hex bolts using a 7mm socket
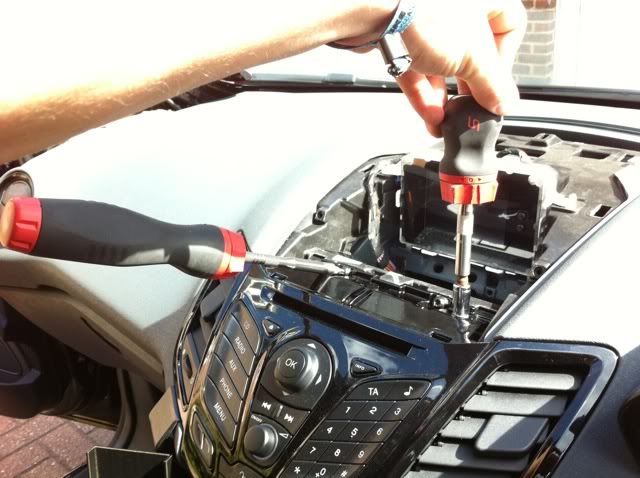
Remove 'secret compartment' and then pull stereo out and upwards
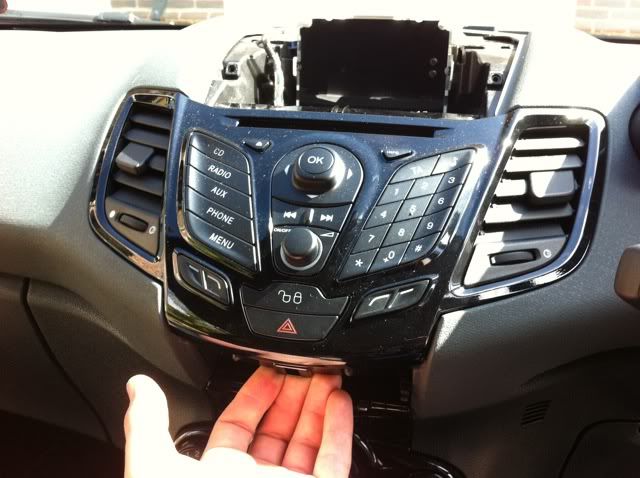
Remove steering shroud
Undo 3 T25 Torx screws
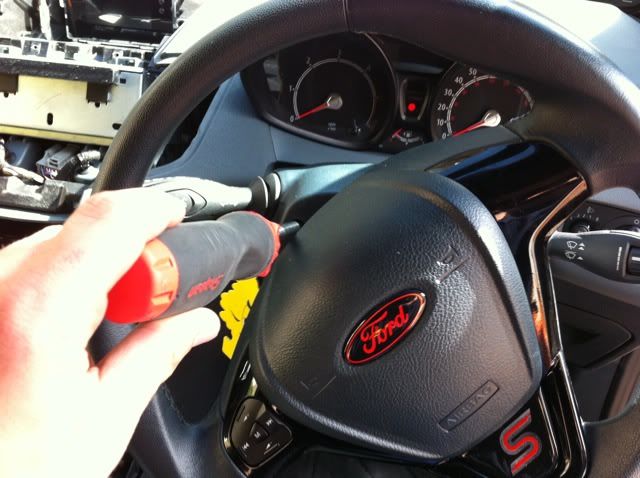
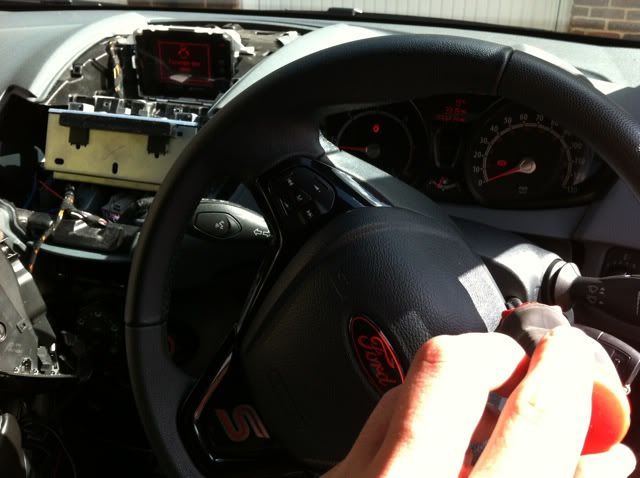
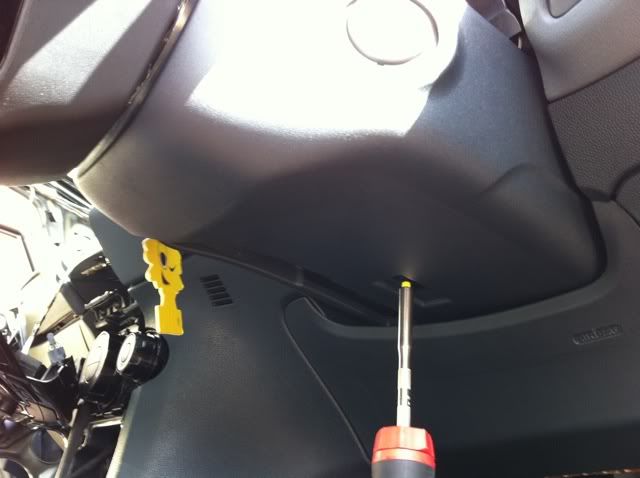
Pull bottom section downwards
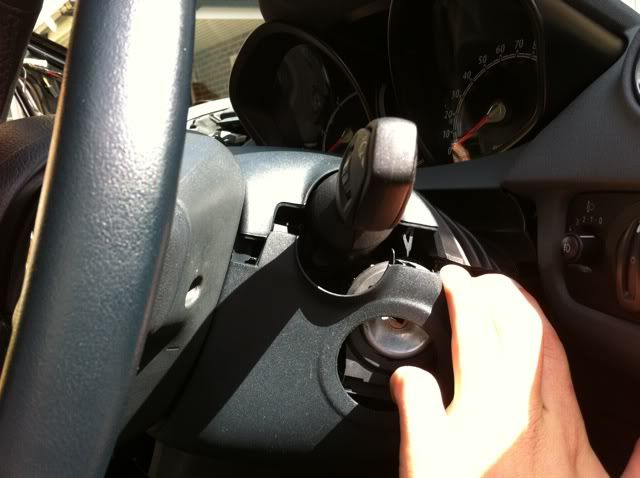
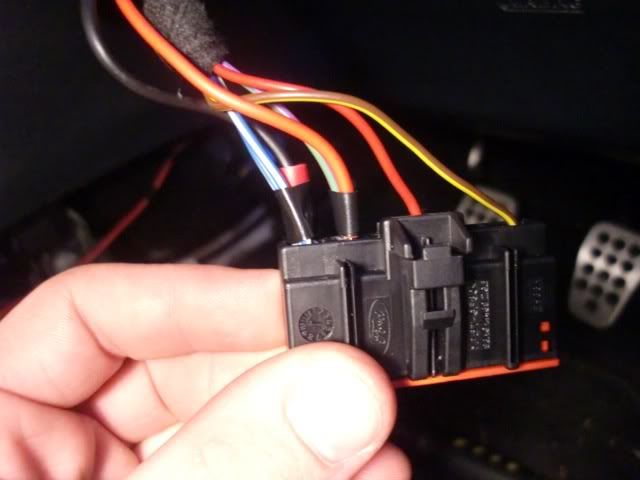
You will then be able to see the ignition loom
Unplug this
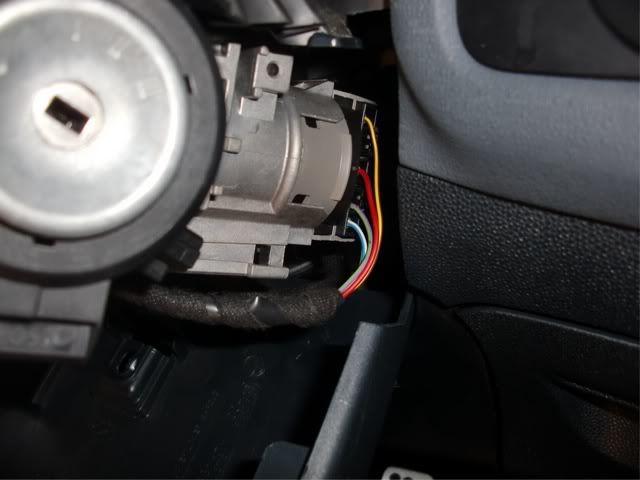
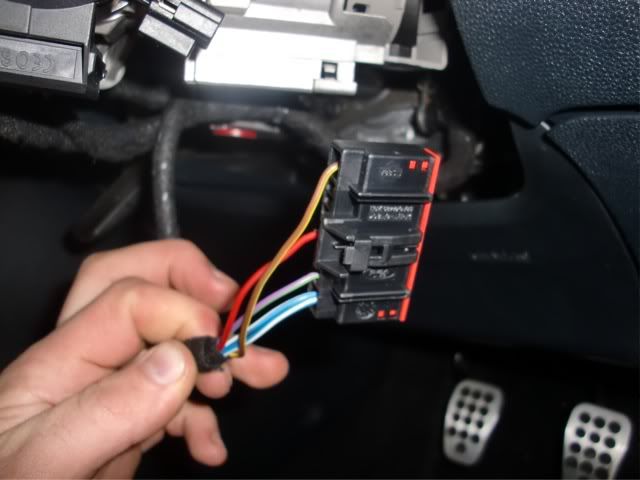
The wires you will need are the purple/green wire and the blue/white wire
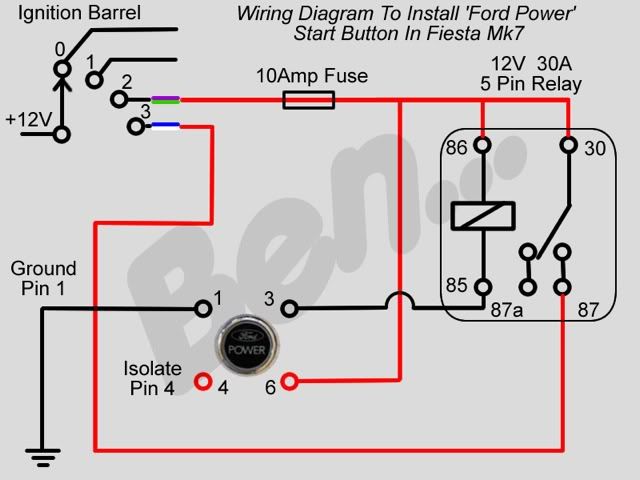
The purple/green wire is live when the key is turned to stage 2 (ignition live)
The blue/white wire is live when cranking the key to start (starter motor)
Use this diagram to wire your switch up
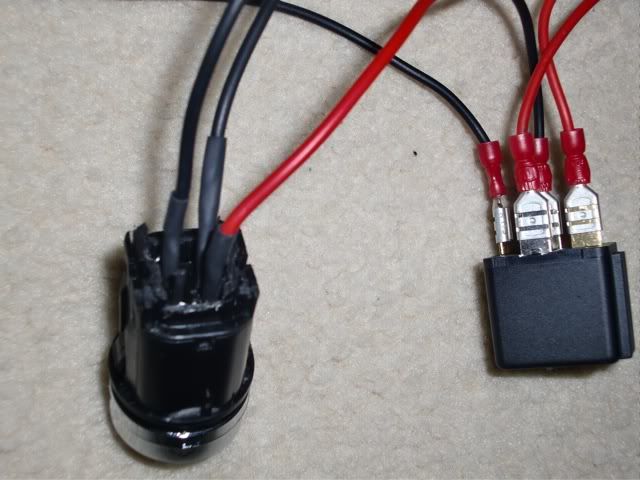
I sawed the excess plastic off the bottom of the switch so was able to access the pins easier
I then bent the pins outwards so they were further away from each other
I soldered wires to the appropriate pins and then insulated using heatshrink
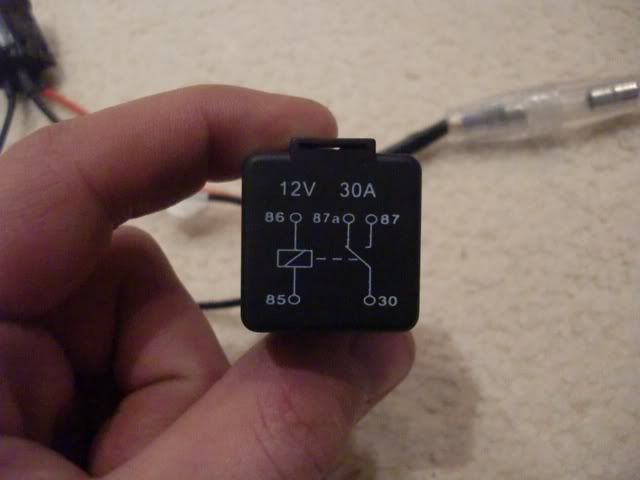
I then connected up the relay using spade connectors
I also used a 10A fuse (you may be able to see this in the background)
I connected the wires to the ignition like this as i didn't want to cut any wires or splice in to them
(I know its not ideal)
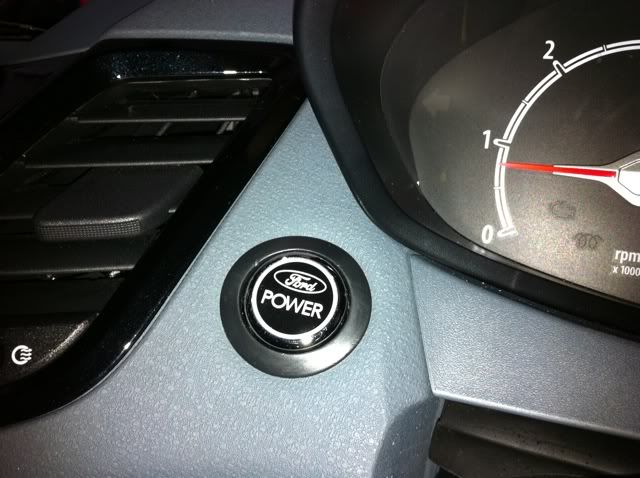
Results
Credits:
Ben...
*This will not replace your key
It will only work when the key is turned to stage 2
What you will need:
Push Start Button - 1459645
Push Start Plastic Bezel - 1574152
Push Start Aluminium Look Bezel - 1667755
12V 30Amp Relay
Soldering Iron & Solder
Red & Black 5Amp Wire
10A Fuse & Holder
Wire Strippers/Crimps
Pliers
Spade Connectors To Suit Relay
Torx Driver
Decide where you would like the button to be positioned
First position I had it

Then I moved it to here
(Pretty hard to cut, BE WARNED!)

First I removed the stereo
Pull up screen surround from the front

Unscrew 2 T25 Torx screws and 2 hex bolts using a 7mm socket

Remove 'secret compartment' and then pull stereo out and upwards

Remove steering shroud
Undo 3 T25 Torx screws


Pull bottom section downwards

You will then be able to see the ignition loom
Unplug this

The wires you will need are the purple/green wire and the blue/white wire
The purple/green wire is live when the key is turned to stage 2 (ignition live)
The blue/white wire is live when cranking the key to start (starter motor)

Use this diagram to wire your switch up

I sawed the excess plastic off the bottom of the switch so was able to access the pins easier
I then bent the pins outwards so they were further away from each other
I soldered wires to the appropriate pins and then insulated using heatshrink
I then connected up the relay using spade connectors
I also used a 10A fuse (you may be able to see this in the background)


I connected the wires to the ignition like this as i didn't want to cut any wires or splice in to them
(I know its not ideal)

Results


Credits:
Ben...